***This Blogpost is in English and Dutch!***
Welkom bij deze bloghop van het International Totally Techniques Designteam! We hebben ook deze
maand weer een leuke techniek "uitgediept" en laten je samen diverse voorbeelden zien!
Leuk dat je er bent!
Welcome to this Bloghop of the International Totally Technique Designteam! This month we have chosen another fun technique again and together we will show you several examples of it! Happy to see you here!
Deze maand gaan we aan de slag met de Masking techniek! Het is een van de oudste, maar ook een van de meest veelzijdige en verrassendste technieken binnen het stempelen!
This month we work with the Masking Technique! It is one of the oldest, but also one of the most versatile and surprising techniques in the world of stamping!
.png)
En juist omdat Masking, oftewel maskeren, op zo veel manieren gedaan kan worden, kun je in deze bloghop een heleboel verschillende variaties vinden. Dus ook veel inspiratie! Daar houden we van!
And since masking can be done in that many ways, you can expect to see several varieties in this bloghop. That means loads of inspiration. And we love that, don't we?
.png)
Bij mijn bijdrage heb ik de Masking techniek op de achtergrond gebruikt, om zo een mooi punt te krijgen om de bloemen op te verwerken. Het is ook meteen een leuke manier om je achtergrondstempels net weer eens even anders te gebruiken!
For my attribution I used the masking technique in the background, to make a nice focal point where I could add the flowers. At the same time it is a fun way to use your backgroundstamps in a slightly different way!
.png)
Alle manieren om deze techniek te doen hebben 1 ding gemeen: Je dekt altijd tijdelijk een deel van je werk af, je voegt dus een "mask/masker"toe, voordat je verder stempelt of inkt. Ik zal vertellen hoe ik dat hier gedaan heb.
All the ways the do the masking technique have one thing in common: You always temporarily cover part of your project, so you add a "mask" before heading to the next stapp of stamping or inking. I will explain how I did this for this card.
.png)
Als eerste maakte ik zelf mijn masker. Hiervoor gebruikte ik het stukje sheet waarop onze Photopolymer stempels geleverd worden. Als je je stempels in het doosje hebt geplakt heb je dit stukje over. Het is stevig, maar toch lekker dun, dus zonde om weg te gooien. Ik stanste er hier bijvoorbeeld een cirkel uit. Dit levert me meteen twee maskers op. Het omringende stuk, en de cirkel. Beiden kun je gebruiken, maar vandaag gebruik ik alleen de binnencirkel.
First I made my own mask. I used the plastic sheet on which you get our Photopolymer stamps. After putting those in our handy stampcases, you have that sheet left. It is sturdy, but also thin, so it it would be a waste to toss it in the bin. Here I diecut a circle from it. That gives me two masks. The circle and the surrounding piece. Today I will only use the diecut circle, but make sure you keep both of them for more projects!
.png)

Ik plakte de cirkel met een gluedot op een stukje Real Red cardstock. Door eerst even met mijn vingers een paar keer over de gluedot te tappen zorg ik dat de kleefkracht net wat minder wordt en dat mijn papier dus niet beschadigt als ik straks de cirkel wil verwijderen. Dan beinkt ik de prachtige Layered Stripes achtergrondstempel met Real Red inkt.
I adhered the circle on a piece of Real Red Cardstock. By tapping the gluedot a few times with my fingers it becomes a bit less sticky, which is nice because I don't want it to ruin my paper when I will remove the circle in a next step. Then I ink the Layered Stripes background stamp in Real Red.
.png)
.png)
Ik druk de stempel af en verwijder dan de cirkel om hem even te reinigen. Je veegt de inkt er zo van af. Dan plaats ik de circle even terug en blend ik zachtjes wat inkt om de cirkel heen, zodat het contrast net iets groter wordt. Dan haal ik de cirkel weg en is mijn subtiele achtergrond klaar!
I stamp the image on my cardstock and remove the circle to clean it. It is easy to whipe the ink off. Then I put the circle back and blend some ink around the edges just to get a little more contrast. Next I remove the circle again and my subtle background is done!
.png)
Klaar om verder te decoreren!
Ready to decorate!

.png)
Met de prachtige set Two Tone Flora maak ik een lekkere voorraad bloemen en blaadjes. Deze set heeft prachtige details, en de bloemen stel je in twee stappen samen, oftewel door two step stamping. Met de bijpassende stansen stanste ik alle bloemen en blaadjes uit.
With the gorgeous set Two Tone Flora I make a nice bunch of flowers and leaves. This set has lovely details and the flowers are stamped in two steps! With the matching dies I diecut all the flowers and leaves.
.png)
De basis van de bloemen stempelde ik in Real Red, de details in Merry Merlot. om optimaal contrast te verkrijgen kregen de blaadjes de super frisse kleur Tahitian Tide. Doordat beide kleuren tegenover elkaar in de kleurencirkel staan straalt de kaart veel frisheid energie uit. De bloemen drapeerde ik mooi rond de cirkel.
De base of the flowers was stamped in Real Red, the details in Merry Merlot. To get an optimal contrast the leaves were made in Tahitian Tide. Since both colours are on opposite sides of the colourwheel the card looks very fresh and energetic! The flowers are all placed around part of the circle.

Wat randjes subtiel opkrullen en sommige delen op dimensionals verwerken geeft net wat extra diepte.
Curling some edges and raising parts with dimensionals gives extra dimension.

.png)
De tekst maakte ik met de geweldige set Echt iets bijzonders, de ederlandse variant van Something Fancy. Met de Something Fancystansset maakte ik er mooi eenvoudig label van.
The text was made with the lovely set Echt iets Bijzonders (the Dutch version of Something Fancy). With the matching dies I turned it into a lovely simple label.
.png)
De strakke lijnen in de achtergrond vormen een mooi contrast met de ronde organische vormen van de bloemen!
Het is heerlijk dat je al die producten zo makkelijk kunt combineren!
Leuk om te weten: De gebruikte sets zijn allen te vinden in onze Mini Catalogus!
The straight lines of the background form a lovely contrast with the organic shapes of the flowers.
It is lovely to match all those products together, and with so little effort!
Nice to know: All used sets can be found in our Mini Catalog!
.png)
Heel erg leuk dat je vandaag bij de Kijkkast bent komen kijken! Heb je vragen? Stel ze mij gerust! Onderaan dit bericht vind je een lijst met alle gebruikte producten, en deze zijn allen te bestellen bij de Kijkkast! Ik help je graag!
Dan is het nu tijd om verder te hoppen, de links naar de andere designers vind je hier onder! Heel veel plezier alvast, en hopelijk tot snel! XXX Annette💚
I really love the fact you visited de Kijkkast today! Please just ask when you have any questions! Below you will find a list of all the products I used. All new products can be ordered through de Kijkkast. I will be happy to help you!I now invite you to hop to the other designers to see what they made. Have fun, and feel free to visit de Kijkkast any time you like! XXX Annette💚
Wat heb ik gebruikt:
Stempels: Layered Stripes, Two Tone Flowers, Echt Iets Bijzonders
Papier: Cardstock: Real Red, Basic White
Inkt: Real Red, Parakeet Party, Merry Merlot
Papier: Cardstock: Real Red, Basic White
Inkt: Real Red, Parakeet Party, Merry Merlot
Dies; Two Tone Flora Dies, Something Fancy Dies, Layering Circles Dies
Embellishments: 2022-2024 in Color Matte Decorative Dot
Tools: Stampin'Cut& Emboss Machine, Blending Brushes
Extra: Scrap piece of protective sheet
.png)
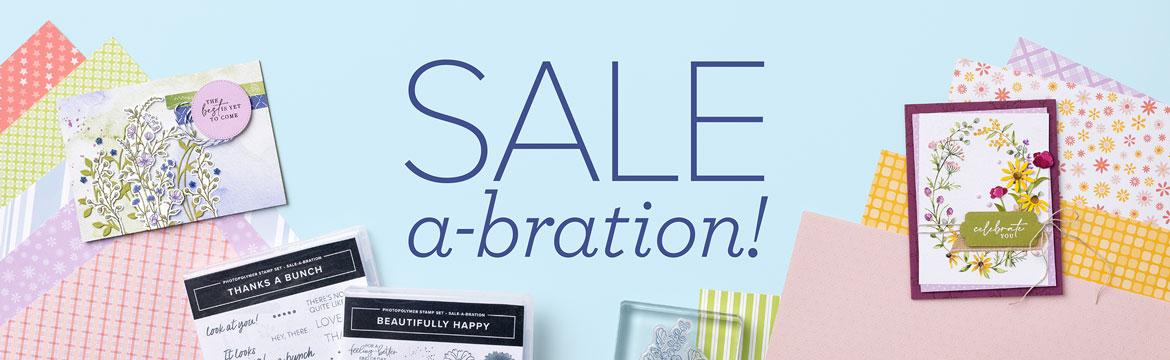
Van 5 januari t/m 28 februari: SALE-A-BRATION!
Gratis stempelkadoos bij je bestelling! Lees er HIER alles over!
Eerstvolgende (MEE)besteldagen
Maandag 27 februari 19.00 uur
Maandag 6 maart 19.00 uur

Gebruik in Februari de hostcode VP6HANQT als je online bestelt zodat ik je een bedankje kan geven!
Bij een bestelling vanaf 97,50 krijg je deze maand gratis een pakje Opaque Adhesive Backed Gems
twv 9,75.
💓De allerbeste DEAL: Het Stampin'Up! Startpakket!💓
Kies voor 175 euro en betaal slechts 129 euro
minimaal 20 procent korting op volgende bestellingen
Gratis toegang VIP Lounge!
Lees HIER alles!
NIEUWE KIJKKAST WORKSHOPS!!

Check >>>HIER<<< het nieuwe workshopprogramma voor de komende tijd!!!
Catalogus aanvragen:


Wil jij de dikke Jaarcatalogus, de nieuwe Minicatalogus en/of de Sale-A-Brationbrochure ontvangen? Vraag ze nu bij mij aan!
Klik HIER voor alle info!
en spaar voor gratis producten!
***Met diverse Clubvoordelen ;o)***
Jij hebt altijd van die geweldige ideeën ☺️ dus nooit zo’n sheet weggooien 😉 en je kaart is echt heel mooi geworden Annette X
BeantwoordenVerwijderen