Welkom bij deze bloghop van het International Totally Techniques Designteam! We hebben ook deze
maand weer een leuke techniek "uitgediept" en laten je samen diverse voorbeelden zien!
Leuk dat je er bent!
Welcome to this Bloghop of the International Totally Technique Designteam! This month we have chosen another fun technique again and together we will show you several examples of it! Happy to see you here!
Deze keer gaan we aan de slag met iets dat ik altijd heel leuk vindt om te doen: Collegestempelen, oftewel de Collagetechniek met stempels.
This time we are doing something that I like a lot: Collage stamping! Or Making a collage with stamps!
Hiermee kunt je allerlei leuke achtergronden maken, en je kunt heerlijk mixen en matchen met stempels, ook uit meerdere sets... en wat ook leuk is, is om te mixen en matchen met wat andere technieken! Zo krijg je nog meer een gelaagd effect!
This technique can give you all kinds of fun backgrounds, and you can mix and match with stamps, also from different sets.... and what makes it even more fun is to mix and match with some other techniques! That gives you an even more layered effect!
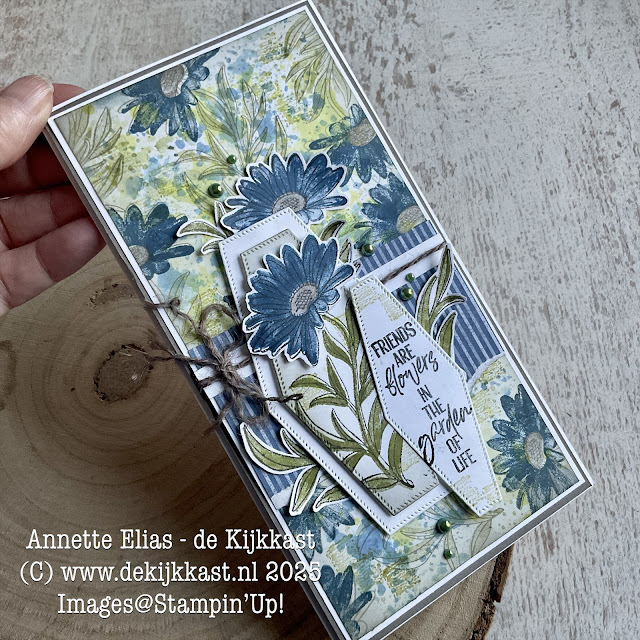
Het leek me leuk een stoere kaart te maken met deze techniek, en ik gebruik er een stempelset bij, die ik toevallig ook een maand geleden gebruikte voor de Totally Techniques workshop. Maar nu dus een totaal andere kaart, in een heel andere stijl! Ik ga je vertellen welke stappen ik heb doorlopen om deze kaart te maken!
I thought it would be fun to make a rustic, natural card with this technique and I have used a stampset that I happen to have used a month ago for this bloghop as well. But now it is a totally different card, in a completely different style! I will tell you what steps I took to make this card!
Stap 1: Het startpunt was een half a4 vel Thick Basic White. Daar wilde ik eerst wat kleur op aanbrengen. Ik depte wat Smoky Slate inkt op mijn glazen werkplaat, maakte dit nat met een Stampin'Spritzer, en depte het papier er in. Dit herhaalde ik met Mist Moonlight en Pecan Pie. Daarna liet ik het grondig drogen.
Step 1: Startingpoint was half a sheet A4 Thick Basic White Cardstock. First I wanted to add some colour to that! I dabbed some Smoky Slate ink on my glass worksurface, sprayed it with a Stampin'Spritzer and dabbed the cardstock into the ink. I repeated this with Misty Moonlight and Pecan Pie. Now I made sure I dried it thoroughly.
Stap 2: De gemaakte achtergrond sneed ik in twee delen. Een deel om als achtergrond te gebruiken, en de rest om iets anders mee te doen, wat je straks zult zien in stap 7!
Step 2: The coloured background was cut in two. One part to become a background, the other part for something else, which I will show you in step 7!
Stap 3: Nu begint het eigenlijke collage stempelen! Ik bedacht hoe ik de kaart ongeveer wilde gaan indelen en stempelde vervolgens op twee verschillende plekken heel licht de kreeft uit de set Ocean Friends. De bold stempel stempelde ik eerst flink af, en de detailstempel stempelde ik heel licht af, om een mooie subtiele afbeelding te krijgen.
Step 3: Now the collage stamping begins! I planned how the lay out of the card would be and then stamped two lobsters on the background but made sure I did this very subtle. I stamped of the bold stamp heavily, and the detailed stamp lightly, to make sure I would get a nice, light and subtle impression.
Stap 4: De prachtige scriptstempel uit de Online Only set Elements of Text drukte ik een paar keer af, in Misty Moonlight, en de spikkeltjesstempel uit diezelfde set in Smoky Slate. Afbeeldingen mogen elkaar best een beetje overlappen in dit stadium. Zo krijg je meteen de collage look!
Step 4: De beautiful Scripsstamp from the Online Only set Elements of text was stamped a few times in Misty Moonlight, and the speckle stamp from the same set was stamped in Smoky Slate on several spots. Images can overlap eachother in this stage. This instantly gives the background a collagy look.
Stap 5: Ik heat emboste de bubble stempel in wit, en met Watercolor Pencil bracht ik in deze bubbels wat accentjes aan. Vervolgens inkte ik de randjes van de achtergrond met een Blending Brush.
Step 5: I heat embossed in white the bubble stamp and accented these bubbles with a Watercolor Pencil. Next I inked the edges of the background with a Blending Brush!
Stap 6: Voor wat pit en contrast stempelde ik de tekst meerdere keren op de achtergrond in zwart, en ik matte de achtergrond achtereenvolgens op Basic White en Basic Black Cardstock! De achtergrond was klaar om verder op te leuken!
Step 6: For some contrast and interest I stamped the text severaltimes in Black Memento, and matted the background on Basic White and Basic Black. Now the background was ready for some fun with decorating!
Stap 7: Nu ging ik aan de slag met het overgebleven stuk cardstock uit stap 2! Hier stanste ik een aantal speelse hotseknotsige cirkels uit met de Around it All dies. Deze legde ik in de Soft Waves 3D Embossingfolder. Daarna beinkte ik de randjes, maar daarvan heb ik helaas geen foto gemaakt. Vergeten!
Maar.... we gaan nu alles compleet maken en de kaart verder opbouwen!
Step 7: Now it was time to use the leftover piece from step 2! I diecut a number of wonky circles from this with the Around It all Dies. I layed them all in the Soft Waves 3D Embossingfolder to give them some structure. I inked the edges but failed to make a picture of that step. Oops!
But... now it is time to complete all elements and to build up the card!
Ik gebruikte de cirkels om een gelaagd resultaat te krijgen. Ze blenden mooi met de achtergrond, maar steken toch net genoeg af!
I used the circles to get a layered result. They blend nicely with the background with just enough contrast to add some interest!
Ik stempelde en stanste nog zo'n prachtige kreeft!
I stamped and diecut one more beautiful lobster!
De tekst heat embosste ik in wit!
The text was heat Embossed in White
Er zitten prachtige extra items bij de Ocean Friends-set! Ik stanste een grote koraal uit en knipte die in stukjes, die ik tussen de cirkels stak.
There are several extra's in the Ocean Friends bundle! I diecut a big coralpiece and cut it in smaller parts, that I tucked between and under the circles.
Met een zwarte Stampin'Write Marker doodlede ik een smal lijntje rondom en bracht ik nog wat spettertjes aan.
With a black Stampin'Write Marker I doodled a small line close to the edges, and added some splatters.
En met al die onderdelen maakte ik een leuke compositie! De glimsteentjes maken het af! Het tafereeltje is helemaal compleet zo!
And with all these elements I made a fun composition! The gems are the finishing touch! The scene is complete now!
En alles bij elkaar vormt het een totaalplaatje, een echte collage!
Het is echt geweldig leuk om zo te mixen en te combineren.
Zulke kaarten zijn geen "snelle" kaarten, maar wel echte geniet-kaarten vind ik altijd! Ik hoop dat ik je een beetje op weg geholpen heb om het ook eens te gaan proberen! En vind je het nog lastig, dan kom je gewoon gezellig eens een
workshop bij de Kijkkast doen. Dan kan ik je bij elke stap begeleiden, extra uitleg geven en je ook de foefjes leren die je niet in zo'n tutorial kunt verwerken!
And all together it becomes one piece, a true collage!
It is so much fun to mix and combine this way!
Cards like this are not "quick", but I absolutely enjoy making them so much! I hope I have inspired you a bit, to give it a try too! And if you still think you can't do it, or need some help and instruction then feel welcome to come to one of the Kijkkast workshops. They are full of little tips and techniques that can't be taught in a tutorial like this and I can help you with every step!

Heel erg leuk dat je vandaag bij de Kijkkast bent komen kijken! Heb je vragen? Stel ze mij gerust! Onderaan dit bericht vind je een lijst met alle gebruikte producten, en deze zijn allen te bestellen bij de Kijkkast! Ik help je graag! Dan is het nu tijd om verder te hoppen, de links naar de andere designers vind je hier onder! Heel veel plezier alvast, en hopelijk tot snel! XXX Annette💚
I really love the fact you visited de Kijkkast today! Please just ask when you have any questions! Below you will find a list of all the products I used. All products can be ordered through de Kijkkast. I will be happy to help you! I now invite you to hop to the other designers to see what they made. Have fun, and feel free to visit de Kijkkast any time you like! XXX Annette💚
Wat heb ik gebruikt:
Stempels: Ocean Friends, Elements of Text (Online Only)
Papier: Cardstock: Thick Basic White, Basic White, Basic Black, Misty Moonlight, Pecan Pie|
Inkt: Smoky Slate, Misty Moonlight, Pecan Pie, Black Memento, Versamark
Dies: Ocean Friends Dies, Around It All Dies
Embossing: Soft Waves 3D Embossingfolder
Stampin'Write Marker Basic Black
WatercolorPencils Assortment 2
Embellishments: Embossingpowder White, Tinsel Gems Four Pack (Goudglinstersteentjes) (Uitlopend, nu met korting te bestellen)
Tools: Stampin'Cut & Emboss Machine, Heat Tool, Sponge Daubers, Mini Blending Brushes, Stampin Spritzers', Embossing Additions Tool Kit

Eerstvolgende (MEE)besteldagen:
Maandag 28 april 19.00 uur
Laatste kans producten!
Op is op!
BEMACHTIG ZE NU HET NOG KAN!
Dat kan 7 dagen per week, 24 uur per dag!
Zo veel MOOIS!
Er zijn weer nieuwe ONLINE ONLY-PRODUCTEN!
Volop nieuwe items, die niet in de catalogi staan!
Voel je welkom bij de Kijkkast VIP Lounge!
Extra voorbeelden, Kijkkast Lives, Online open huis, extra tips, gratis workshops!
Lees
HIER hoe ook jij Kijkkast VIP kunt worden!
💓De allerbeste DEAL: Het Stampin'Up! Startpakket!💓
Kies voor 175 euro en betaal slechts 129 euro
Krijg vervolgens minimaal 20 procent korting op volgende bestellingen
Gratis toegang VIP Lounge! en meer!
Altijd leuke koopjes in het KOOPJESREK, op is op!
KIJKKAST WORKSHOPS!!
Check
>>>HIER<<< het nieuwe workshopprogramma voor de komende tijd!!!
en spaar voor gratis producten!
***Met diverse Clubvoordelen ;o)***
Catalogus aanvragen:
Wil jij de NIEUWE JAARCATALOGUS ontvangen?
Vraag deze nu bij mij aan via een
>>email<<! Opsturen of afhalen is mogelijk!


