*This blogpost is in Dutch & English*
Hallo en wat leuk dat je bij deze maandelijkse Ink, Stamp, Share Bloghop komt kijken! Je bent nu bij de Kijkkast, en mijn naam is Annette Elias. Welkom!
Hello, nice to see you and welcome at this monthly Ink, Stamp, Share Bloghop! You are now at de Kijkkast, and my name is Annette Elias.
Deze maand gaan we wel iets HEEL leuks doen! Namelijk... Je eigen kerstdecoraties maken! Vorig jaar hebben we dit ook gedaan en dat was zo leuk! Ik durf je dus wel te beloven dat dit ook nu weer een gave editie gaat worden!
This month we will do something superfun! We will make our own tree decorations! Last year we did a bloghop wih the same theme, and that was so lovely and inspiring! I am pretty sure this one will be too!
Ik vind het zo ontzettend leuk om naast kaarten ook andere dingen te maken met mijn stempelmaterialen. Deze keer ben ik een stapje verder gegaan, en heb ik lekker out of the box gedacht en diverse stempels en stansen eens op een heel andere manier gebruikt!
I love making other things than just cards with all my stamping products! This time I went a step further and went "out of the box" by using stamps and dies for other things then what they were designed for!
Zoals je kunt zien denk je dat ik TOCH een kaart heb gemaakt, en ja, dat is het natuurlijk ook! Je kunt de kaart leuk op je dressoir zetten...
You are probably thinking now: Well she STILL made a card, and that is true, it is a card... You can display it on the mantle when you recieve it ;o)
Maar dat lieve kleine engeltje, kun je zo van de kaart afhalen....
But that cute little angel can be taken from the card....
.... en is dan klaar om zo in de kerstboom te hangen!
..... and then it is ready to hang it into the tree!
Omdat het er naar uitziet dat we elkaar niet veel zullen zien zo rond de feestdagen leek het me leuk om dit soort lieve opstuurbare kerstornamentjes te maken. Een kaartje en een kadootje in een! En natuurlijk heb ik er een tutorial bij gemaakt, mocht je ook aan de slag willen!
Since the signs are becoming more clear that many of us will not meet many loved ones during the december festivities I thought it would be fun to make these sendable little ornaments. It is a card and a little gift in one! And ofcourse I made a tutorial of it, in case you feel inspired to make them too!
En natuurlijk kun je ook gewoon alleen de engeltjes maken, en er lekker je eigen boompje mee volhangen! Ze doen het ook leuk aan kadootjes trouwens!
And ofcourse you can also just make a bunch of the little angles, without the card, to hang them in your own tree!


1) Ik begon met de stempelset Sharing Sunshine, en stempelde op Basic White cardstock 1 keer de ronde stempel met Petal Pink inkt. Vervolgens stempelde ik het gezichtje daarop met Smoky Slate inkt.
Daarna stempelde ik de halve stralen cirkel in Versamark en behandelde deze met zilver embossingpoeder. Daarna stanste ik ze beiden uit met de Layering Circles Dies, waarbij ik ook een extra rondje uit Basic White stanste. Als laatste knipte ik de halve stralen cirkel een beetje bij.
1) I started with the stampset Sharing Sunshine, and stamped the circle in Petal Pink on Basic White cardstock. Then I stampped the face on this circle in Smoky Slate ink.
Next step was stamping the "ray-circle"in Versamark ink and heatembossing this with Silver Embossingpowder. I diecut both with the Layering Circles Dies, and diecut one extra circle in plain white. I adapted the size of the embossed circle a bit by cuttting a strip off.


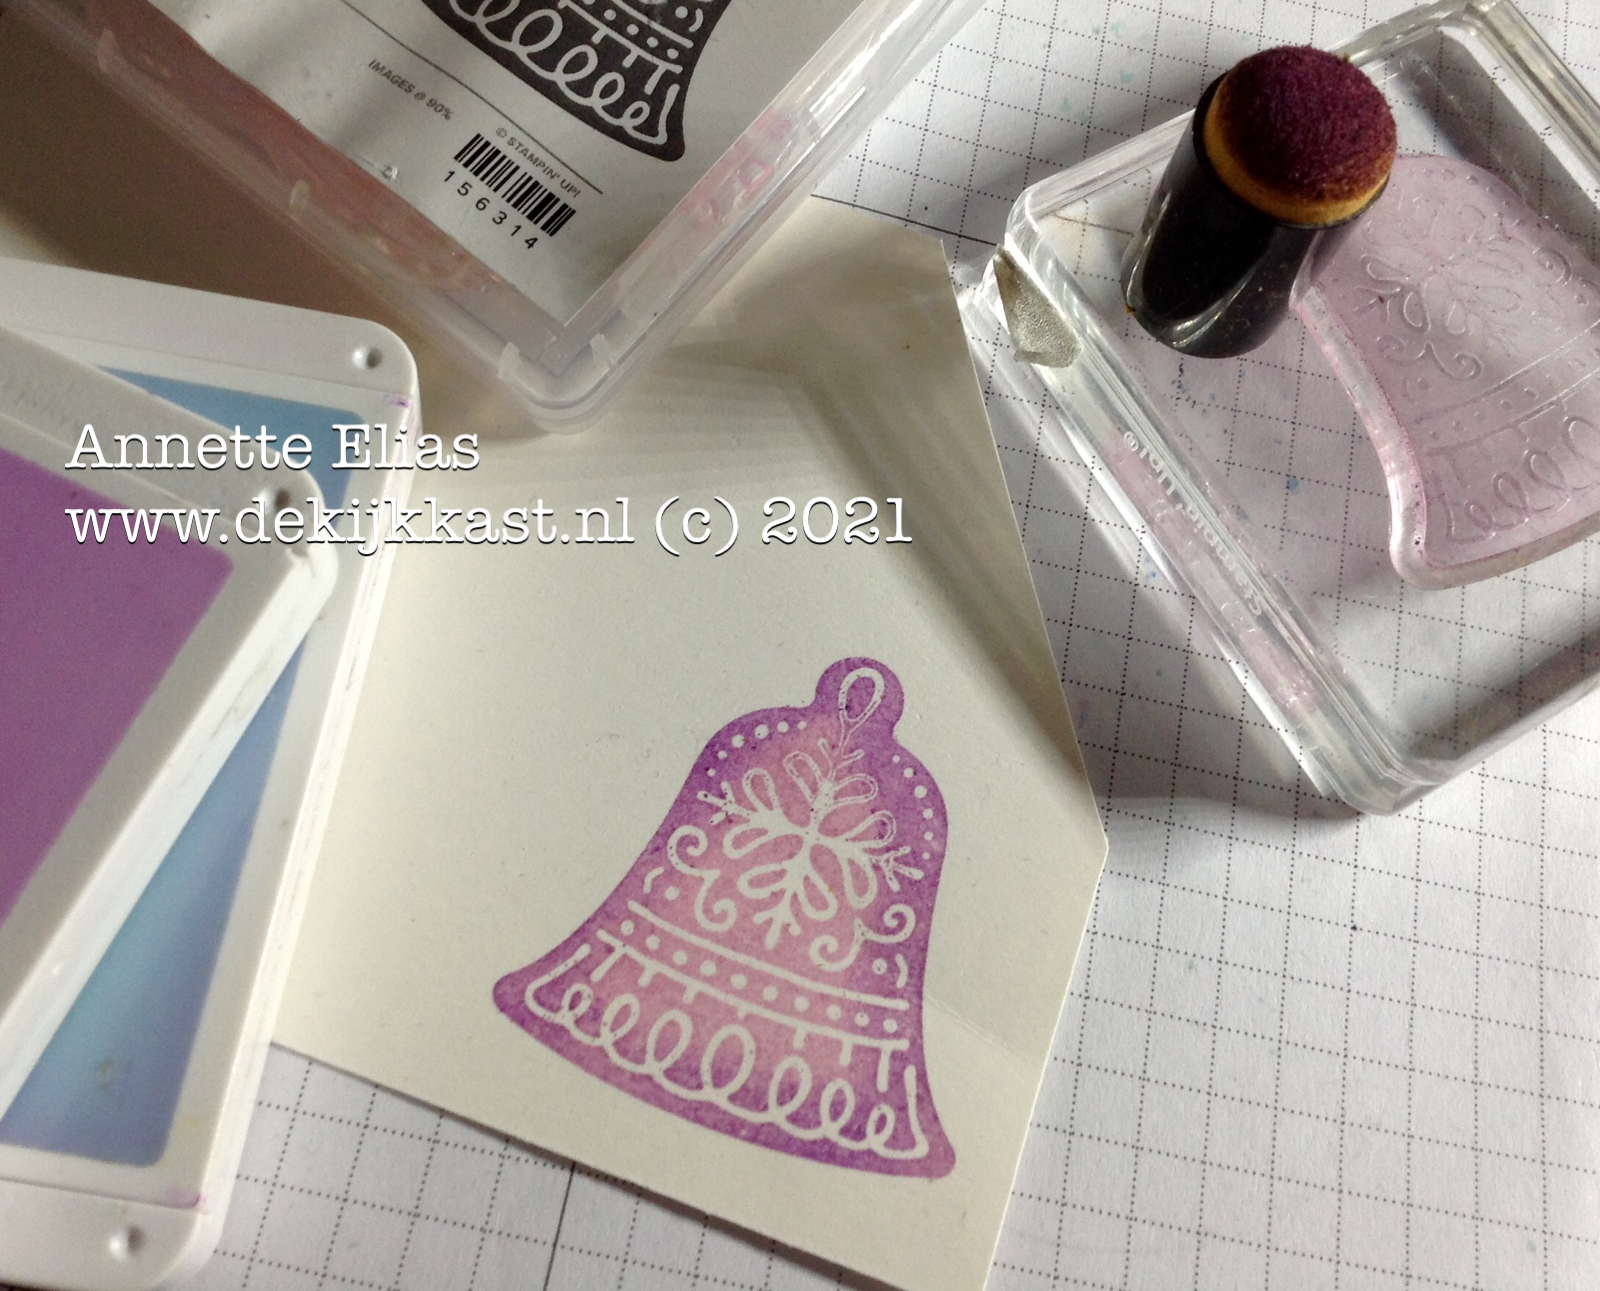
2) Nu nam ik de stempelset Frosted Gingerbread, nam daar de kerstcklok-stempel uit, en beinkte deze op de normale manier met Fresh Freesia inkt, maar daarna voegde ik heel voorzichtig aan de randjes wat Gorgeous Grape inkt toe met behulp van een Sponge Dauber, en drukte toen de stempel af. Ik stanste de kerstklok uit, en stanste er nog eentje extra uit gewoon effen Basic White cardstock
2) Now I took the bell stamp from the Frosted Gingerbread Stampset, and inked this in the normal way with Fresh Freesia ink, but next I added some Gorgeous Grape ink on the edges with a Sponge Dauber. Now I stamped it on cardstock. Now ofcourse I diecut the bell with the matching dies, and diecut a plain white one too!
3) Ik nam wat zilver cardstock uit het Silver Foil Specialty Pack en stanste daar een opengewerkte kerstklok uit van de Gingerbread Dies, en een vlinder, met de kleinste stans uit de Brilliant Wings dies.
3) From a piece of Silver cardstock from the Silver Foil Specialty Pack I diecut the detailed Christmasbell from the Gingerbread Dies, and the butterfly with the smallest die of the Brilliant Wings Dies.

4) Zo had ik alle benodigde onderdelen bij elkaar om het schattige engeltje te kunnen maken!
4) Now I had all the elements I needed to make our cute little angel.


5) Tijd om op te gaan bouwen! Ikknipte de vlinder in tweeen, en plakte de losse vleugels op de effen witte kerstklok. Daarna plakte ik er de opengewerkte kerstklok op, zo dat hij aan de onderkant een flink stuk uitsteekt. Het rondje komt bovenaan ACHTER de kerstklok, en daarbovenop komt de stralenkrans waar ik nog een stukje vanaf had geknipt zodat ik ongeveer twee derde deel over hield.
5) Time to start assembling! I cut the butterfly in two halves and added them to the plain withe bell. Then I added the detailed bell to it, in a way that it sticks out on the bottom of the other bell. added the circle BEHIND the bell, and as a last step I added the halo, of which I had first removed 1/3 part.

6) Met 15 cm van het zilveren koord uit het Elegant Trim maakte ik een simpel lusje. Deze bevestigde ik op de engel, die ik vervolgens bedekte met een aantal Dimensionals. In dit stadium ziet het er een beetje hopeloos, of zeg maar gerust rampzalig uit, maar maak je geen zorgen, het komt helemaal goed!
6) With 15 cm of the silver cord of the Simply Elegant Trim I made a loop and added it to the angel. I covered the surface with Dimensionals. In this stage it looks like a didaster, but don't worry, everything will be fine!


7) In stap 7 kom je namelijk in de mooimaakfase! Ik bevestigde het gezichtje op de kerstklok en pimpte deze lekker op met Basic Rhinestones en In Color Jewels. Het is kerst dus lekker blingeren mag!
7) In step 7 comes the pretty part ;o) I adhered the face to the bell, and decorated it with Basic Rhinestones and In Color Jewels. It is Christmas, so going overboard with blingy bits is allowed.

8) Nu komt dit onderdeel op het eerst gemaakte deel Door de Dimensionals krijg je een gaaf diepte effect, en alle "schande"is mooi weggewerkt tussen de beide laagjes, zodat de achterzijde er ook netjes afgewerkt uitziet. Wahoo, de kerstengel is klaar!
8) Now we get to the best part! Add the stamped angel to the one we made first. The dimensionals add depth to the parts, and all the ugly bits are hidden. The backside looks very nicely too! Wahoo, our angel is ready now!

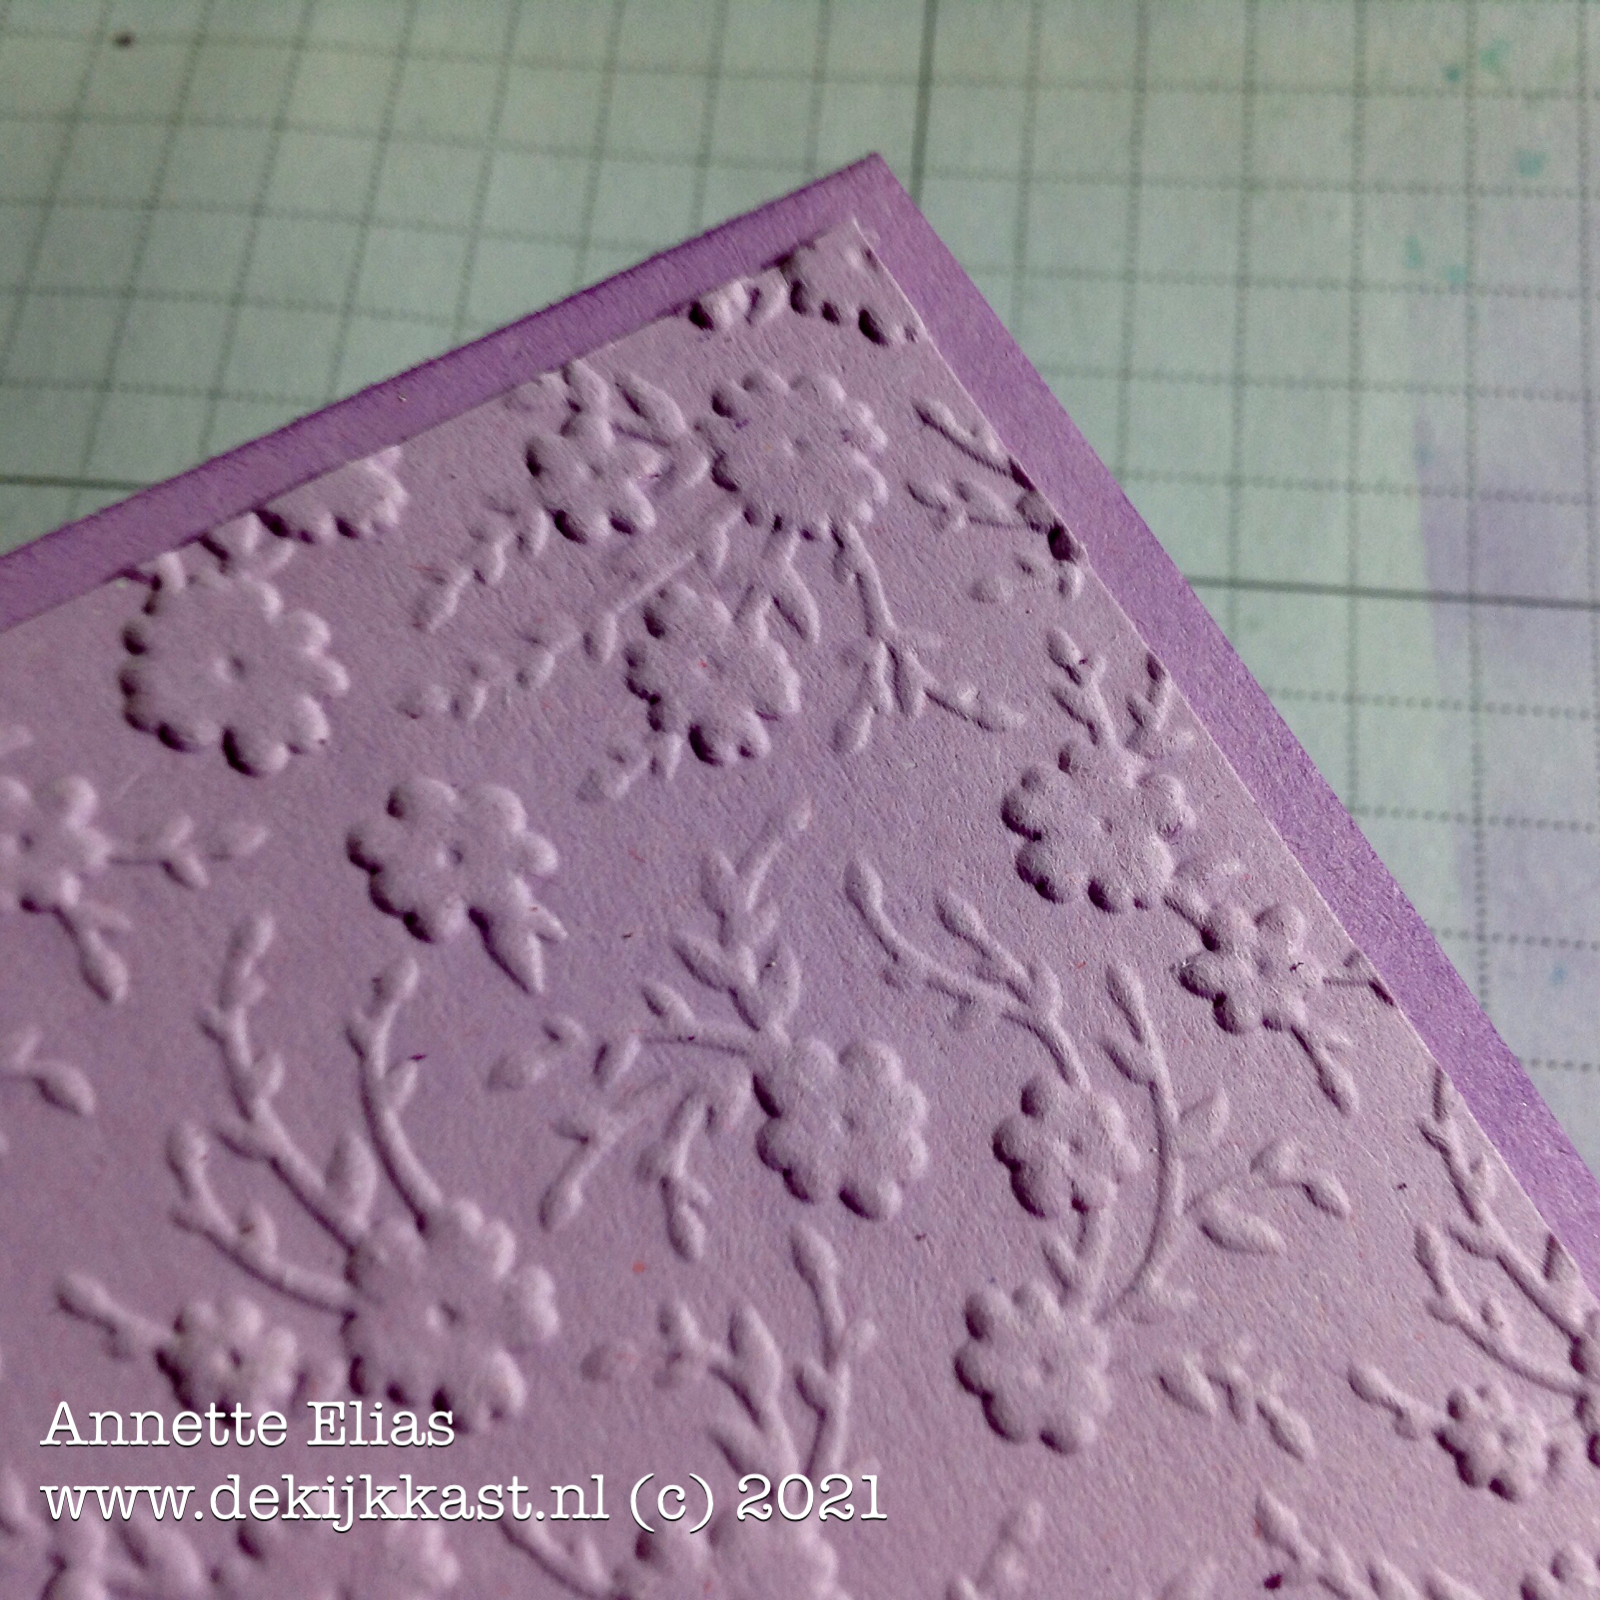
9) De basiskaart uit Fresh Freesia Cardstock is 10,5 x 29.7 cm en deze wordt dubbelgevouwen. De randjes zijn licht gekleurd met Gorgeous Grape inkt en een Blending Brush. Daar bovenop komt een laagje Fresh Freesia carstock van 10 x 14,45 cm die ik geembosd heb met de Ornate Floral Embossingfolder.
9) De cardbase from Fresh Freesia Cardstock is 10,5 x 29,7 cm folded in half. I coloured the edges with Gorgeous Grape ink and a Blending Brush. On top of that comes a layer of 10 x 14,45 Fresh Freesia cardstock that was embossed with the Ornate Floral Embossingfolder.


10) En ook snijd ik een paneel van 9 x 13,45 cm Fresh Freesia Cardstock. Ik maak twee kleine gaatjes op 1 cm van de bovenkant en 3,5 cm van de zijkanten. Ik maak een knipje van de bovenkant tot deze gaatjes. Aan de voorzijde inkt ik de randen met Gorgeous Grape inkt, en met de stempelset Fantastische Feestdagen voeg ik een zilver geemboste tekst toe aan de onderkant van het paneel.
10) And also I cut a panel of 9 x 13,45 cm Fresh Freesia cardstock. I made two little openings 1 cm fro the top, and 3,5 cm from each side. With my scissors I cut ffrom the top edge to the holes. On the front I inked the edges again with Gorgeous Grape Ink and a Blending Brush. At the bottom I add a silver embossed text from the set Fantastische Feestdagen.
11) Nu kun je heel makkelijk het engeltje vastmaken aan dit paneel, en dit paneel komt nu met Dimensionals op de kaart. Het is wel verstandig om geen dimensionals in de buurt van de sleufjes te doen, zodat hij op en van de kaart gehaald kan worden.
11) Now it is easy to add the angel to this panel, and to add the panel to the card. Be sure not to put Dimesionals close to the top, to be certain you can add and remove the angel.
12) natuurlijk is het leuk om ook aan de binnenkant even een passende tekst te stempelen!
12) Ofcourse it is nice to stamp a fitting text on the inside

De kaart is nu klaar om een beetje liefde, vrede en geluk te verspreiden!
This card is now ready to spread a little love, peace and happiness!

En het schattige engeltje is klaar om een gezellige boom op te sieren!
And our little angel is ready to decorate someones cosy Christmastree!
Is het niet leuk om je stempels te mixen en te matchen? Een klok die engelenjurk wordt, een zon die een engelengezichtje wordt, Vlindervleugels die ineens aan een engeltje vast zitten... In het stempelen kan gewoon alles, als je een beetje creatief bent! Hoe leuk is dat toch!
Isn't it fun to mix and match with your stamps and dies? A Christmasbell becomes a dress, a sun becomes the face of an angel, and thebutterflywings are suddenly part of a funny little angel. In the world of stamping everything is possible, when you just add some creative flow! Isn't that fun?
Dit was dan weer mijn bijdrage aan deze BLOGHOP! Een reactie stel ik altijd erg op prijs. Een lijst van gebruikte producten heb ik hieronder ook toegevoegd. Alle gebruikte producten zijn verkrijgbaar bij de Kijkkast. Via de NEXTknop hieronder kun je de bloghop nu gaan vervolgen. Maar eerst wil ik je nog even hartelijk danken voor je bezoekje aan de Kijkkast! Leuk dat je er was! Hopelijk tot snel! XXX Annette
So far my attribution to this Bloghop! I hope you liked it and would love to read your reaction!
I added a list of all used products below. All items can be ordered at de Kijkkast!
Through the link below you can continue this bloghop. But first I want to thank you for visiting de Kijkkast! It was so nice to have you here! Please feel free to come back any time you like! XXX Annette Roll Call
Jo Blackman
Annette Ball
Angie McKenzie
Sue McDonald
Cindy Mitchell-Clark
Gez Carpenter
Linda Moore
Stacey Marsh
Susan Simpson
Mo Rootes
Karen Egan
Kirsty Pattrick
Jill Chapman
Victoria Littlewood
The Stamping Ground
Annette Elias
Tricia Butts

Wat heb ik gebruikt:
Stempels: Frosted Gingerbread, Sharing Sunshine, Fantastische Feestdagen
Papier: Cardstock: Fresh Freesia, Basic White
Silver Foil Specialty Pack
Inkt: Fresh Freesia, Gorgeous Grape, Petal Pink, Smoky Slate, Versamark
Dies: Gingerbread Dies, Brilliant Wings Dies, Layering Circles Dies
Embossingfolder: Ornate Flowers
Embellishments: Simply Elegant Trim, Rhinestones Basic Jewels, 2021-2023 In Color Jewels, Silver Embosingpowder
Tools: Stampin'Cut & Emboss Machine, Blending Brushes, Sponge Daubers
Eerstvolgende (MEE)besteldagen
Maandag 29 november om 19.00 uur
Maandag 6 december om 19.00 uur
De Kijkkas-OKTOBER-actie: Gebruik de actuele hostesscode UAF3VDP7
en ontvang bij een bestelling vanaf 95 euro
nu gratis een pakje Wonderful Gems twv 9,75 euro!
TIP: Bestel je voor 200 euro of meer mag je voor 10 procent van je bestelbedrag
GRATIS producten uitkiezen!
💓De allerbeste DEAL: Het Stampin'Up! Startpakket!💓
Kies voor 175 euro producten uit en betaal slechts 129 euro
ALLEEN DEZE MAAND kost het Startpakket
SLECHTS 100 EURO!
Laat dit vervolgens gratis (zonder verzendkosten!) naar je huis versturen.
Je krijgt hierbij ook nog gratis catalogi ed meegestuurd!
en bestel -als je dat wilt- voortaan je eigen stempelmaterialen met altijd minstens 20 procent korting!
Lijkt dit jou ook een topidee? Neem snel contact met mij op! Dan help ik je verder!
Catalogus aanvragen:
Wil jij de nieuwe catalogus en/of Minicatalogus ontvangen? Vraag hem nu bij mij aan!
NIEUWE THUISWORKSHOP!!!! Meld je NU aan!
Nu online: Happy-At-Home workshopbox nr 3!
Meld je snel aan!
Wil je ook een supercomplete Kijkkast WORKSHOP doen vanuit je eigen huis?
en spaar voor gratis producten!
***Met diverse Clubvoordelen ;o)***


oh wow!how pretty. x
BeantwoordenVerwijderenWow, what a clever Idea. I love the colours xx
BeantwoordenVerwijderenWow! Just an inspired design
BeantwoordenVerwijderenWauw, wat een gave engel!
BeantwoordenVerwijderenWhat a fantastic creation!
BeantwoordenVerwijderen