Posts tonen met het label CASE. Alle posts tonen

zaterdag 28 maart 2026

CASE kaart in roze en groen - Ink Stamp Share Bloghop - Showcase

  *This blogpost is in Dutch & English*

Hallo en wat leuk dat je bij deze maandelijkse Ink, Stamp, Share Bloghop komt kijken! Je bent nu bij de Kijkkast, en mijn naam is Annette Elias. Welkom!

Hello, nice to see you and welcome to this monthly Ink, Stamp, Share Bloghop! You are now at de Kijkkast, and my name is Annette Elias.


In deze Showcase bloghop laten de deelnemers zien waar ze zoal mee bezig zijn. Een heel vrije invulling dus! Dat levert altijd een heerlijk afwisselende berg inspiratie op!

In this Showcase Bloghop you can just show, whatever you have been working on! So there will probably be lots of versatility and inspiration!


Het was een flink gevulde week met vier Clubworkshops, een ochtend vrijwilligerswerk en ook nog de nodige bloghops en instahops en wat doe je dan op je vrijdagavond? Juist ja... gezellig muziek luisteren, thee drinken, en een kaart maken, die in je hoofd zit, en er uit wil....

It was a richly filled week over here, with four Clubworkshops, a morning of volunteer work, and a number of bloghops and insta hops... So what would I do on my Fridayevening? Yes, indeed... Listen to some music, drink lots of hot tea and making a card, that has been living in my head and now wants to come out!


En dit is de kaart die er uit voortkwam... Een kaart met lieve pastelkleuren, veel bloemen, veel diepte, een inktige achtergrond, en wat leuke details!

And this is what came out of it... A card in sweet pastelcolours, lots of flowers, lots of depth, an inky background and some fun details!

Aanleiding was deze leuke Challenge van Global Design Project, waarbij we deze week deze mooie kaart van onze nederlandse democollega Monique mochten CASEn. Wat een prachtige elegante kaart he!
CASE= Copy and selectively edit!

What caused the urge to make this card was this fun challenge of Global Design Project, in which we are asked to CASE this card of our Dutch fellow demo Monique! Isn't that a lovely, elegant card?
CASE= Copy and selectively edit!


Bij het CASEn van een kaart is het de bedoeling dat je herkenbaar elementen van de voorbeeld kaart overneemt, maar er duidelijk een eigen sausje overheen giet. Zowel overeenkomsten als verschillen dus!

When CASEing a card it is the most fun to take elements from the inspirationcard that are recognisable, but also add your own creative sauce to it... So there are similarities and differences!


Nou, Monique en ik gebruikten beiden in ieder geval de zelfde stempelset... Fragrant Layers! Deze fantastische set met HEEL VEEL creatieve mogelijkheden is te vinden bij de Online Only producten!

Well, Monique and I both used the same stampset: Fragrant Layers! This beautiful set with LOTS of creative possibilities can be found at the Online Exclusive items!


Maar Monique kleurde de bloemen in met inkt en een penseel, maar ik gebruikte de "invulstempels" uit de set om kleur aan te brengen. En zij voegde een bloemenafbeelding toe, terwijl ik de hele kaart er mee vulde.

But Monique coloured the flowers with ink and a Water Painter, while I used the "fillerstamps" from the set to add colour. And she added one flower, while I completely filled the cardfront with them!


Monique koos voor een mooie cardstock achtergrond die ze met een Embossingfolder wat structuur gaf... Ik maakte een ruige inktige achtergrond met de Faux Chalkpaint techniek, waarin de kleuren terugkomen, en door het verhoogd opplakken van de bloemen verkreeg ik de nodige structuur.

Monique made a lovely cardstock background that she gave some texture with an embossingfolder. I made a rustic inky background with the Faux ChalkPaint  technique in which I used the colours of the card, and by raising the flowers with dimensionals I added the texture.


We gebruikten beiden de kleuren roze met groen, maar waar Monique voor het zachte Bubble Bath met  Soft Sea Foam ging, koos ik voor Pretty in Pink met Lost Lagoon, wat een iets pittigere combi is.

We noth used pink with green, but where Monique chose for the softer Bubble Bath and Soft Sea Foam, I went for Pretty in Pink and Lost Lagoon,which are a bit more saturated pastels


We heat embossten beiden een tekst in wit op Basic Black cardstock, die Monique uitknipte, en ik uitstanste. Ik voegde voor wat extra stoerheid zwarte spettertjes toe. Monique voegde wat roze lint toe, maar ik gebruikte Black Bakerstwine. Wel kozen webeiden dan weer voor wat lieve dotjes als finishing touch! Zo zie je maar... veel is het zelfde, maar ik heb er toch echt een eigen creatie van gemaakt met mijn eigen sfeer en stijl. Dit soort uitdagingen vind ik zo leuk! Bedankt Monique voor je prachtige kaart die ik mocht casen!

We heat embossed the text in white on Basic Black cardstock, that was fussycut by Monique, while I diecut mine. I added some Black splattering for a more rustic look. Monique decorated it with some cute pink ribbon, but I chose to use some Black Bakers Twine. We both used some sweet dots as a finishing touch! As you can see... Lots of elements are the same, but I still made it my own creation with my own detaisl and style! I love challenges like this! Thanks Monique for this beautiful card I was challenged to CASE!


Zo, dit was dan weer mijn bijdrage voor deze keer!
Natuurlijk zijn alle gebruikte producten te bestellen bij de Kijkkast.
Onderaan deze blogpost vind je een lijst met alle gebruikte materialen en kleuren.
Heb je vragen? Mail dan gerust even. Ik help je graag verder!
Wil je een reactie plaatsen? Hartstikke leuk, en dankjewel alvast!
En dan is het nu tijd om verder te hoppen naar de volgende creatie!
Heel veel plezier, dank voor je bezoek aan de Kijkkast, en tot snel! XXX Annette💓

Well, this was my attribution for this Bloghop! I hope you liked it!
All the used products can be ordered through de Kijkkast.
Below this blogpost is a list of all the used products.
When you have any questions about this project, please just ask, I will be happy to help you!
Would you like to post a reaction? I would really appreciate that!
And now it is time to continue this bloghop.
Have fun hopping, thanks for visiting de Kijkkast, and I hope you will come back here soon! XXXAnnette💓

Wat heb ik gebruikt:
Stempels: Fragrant Layers (Online Only)
Papier: Cardstock: Basic White, Lost Lagoon, Pretty In Pink, Basic Black
Inkt: Lost Lagoon, Pretty in Pink, Black Memento, Versamark
Dies: Fragrant Layers Dies
(Online Only)
Stampin'Blends: Pretty in Pink (For the flowercentres)
Embellishments: Bakerstwine Essentials Pack, Rondjes in een gedempt Palet, Embossingpoeder wit
Tools: Stampin'Cut # Emboss Machine, Water Painters, Heat Tool, Embossing Additions Tool Kit, Take Your Pick Tool, Paper Snips


Lees HIER alle nieuws en acties van maart!!


Eerstvolgende (MEE)besteldagen:
                            Maandag 30 maart, 19.00 uur
                        

Dat kan 7 dagen per week, 24 uur per dag!


Product van de maand maart!
De Exclusieve Stempelset Notes of Spring
kun je voor slechts 6 euro meebestellen bij een bestelbedrag vanaf 90 euro


Koopjes en laatste kans items aangevuld!!
Er zijn weer nieuwe ONLINE ONLY-PRODUCTEN!
Volop nieuwe items, die niet in de catalogi staan!
Je vindt ze >>HIER<<


Voel je welkom bij de Kijkkast VIP Lounge!
Extra voorbeelden, Kijkkast Lives, Online open huis, extra tips, gratis workshops!
Lees HIER hoe ook jij Kijkkast VIP kunt worden!


💓De allerbeste DEAL: Het Stampin'Up! Startpakket!💓
Kies voor 175 euro en betaal slechts 129 euro
Krijg vervolgens minimaal 20 procent korting op volgende bestellingen,
Gratis toegang VIP Lounge! en meer!


KIJKKAST WORKSHOPS!!
Check >>>HIER<<< het nieuwe workshopprogramma voor de komende tijd!!!


en spaar voor gratis producten!
***Met diverse Clubvoordelen ;o)***


Catalogus aanvragen:

Wil jij de actuele JAARCATALOGUS 
 of de nieuwe voorjaars Mini Catalogus ontvangen?
Vraag deze nu bij mij aan via een >>email<<! Opsturen of afhalen is mogelijk!
Meer info is te vinden op de Catalogus Info


vrijdag 27 februari 2026

Just A Note, in Springstyle - Totally Techniques Bloghop - Double Embossing

 ***This Blogpost is in English and Dutch!***

Welkom bij deze bloghop van het International Totally Techniques Designteam! We hebben ook deze
maand weer een leuke techniek "uitgediept" en laten je samen diverse voorbeelden zien!
Leuk dat je er bent!

Welcome to this Bloghop of the International Totally Technique Designteam! This month we have chosen another fun technique again and together we will show you several examples of it! Happy to see you here!

Deze maand gaan we voor Double Embossing!

This month we will do some Double Embossing!


Double Embossing is een combinatie van Heat Embossen en droog (met een embossingfolder) embossen!

Double Embossing is a combination of Heat Embossing and Dry (With an embossingfolder) embossing!


Je kunt er onder andere heel gave achtergronden mee maken! Maar hoe werkt dat dan? Ik zal uitleggen hoe ik het gedaan heb, want ik heb de techniek een extra "stapje"gegeven.

You can do all kind of fun things with it, like making cool backgrounds! But how does it work? I will explain to you what I did, since I gave the technique an extra "step".


Eerst nam ik drie stroken cardstock van 4,5 bij 9,5 cm in de kleuren Bubble Bath, Petunia Pop, en Granny Apple Green. Deze plakte ik aan de achterzijde aan elkaar met simpele stukjes plakband. De voorkant maakte ik alvast antistatisch door er met een Embossingbuddy over te wrijven.

First I took three pieces of cardstock of 4,5 x 9,5 cm in Bubble Bath, Petunia Pop, en Granny Apple Green. I connected them by adding some simple cellotape on the backside. The frontside was made antistatic by wiping the Embossing Buddy over it.


Hierna nam ik de Lovely Stripes Embossingfolder, een Stampin'Roller en Versamark inkt. Met de roller verdeelde ik Versamark inkt over de binnenzijde van de embossingfolder, aan de zijde waar ook het loge zit.

Now I took the Lovely Stropes Embossingfolder, a Stampin'Brayer and Versamark Ink. With the Brayer I added Versamark to the inside of the Embossinfolder, only on the side where the logo is.


Vervolgens legde ik de drie verbonden stroken met de goede kant naar boven op de ONgeinkte kant in de embossingfolder, sloot de embossingfolder, en haalde hem enkele keren door mijn Stampin'Cut & Emboss Machine. Zo raakt het cardstock beinkt en geembost tegelijk.

After that I placed the three attached cardstockpieces in the embossingfolder, with the right side up, on the UNinked side of the folder. I closed the embossingfolder and let it run through my Stampin'Cut & Emboss Machine a few times. That way the cardstock is inked and embossed at the same time.


Nu kwam het Heatembossen aan de beurt! Ik strooide het poeder over het cardstock, klopte het lichtelijk af (persoonlijk vind ik het leuker als het embossing poeder net een beetje onregelmatig aangebracht wordt) en verhitte het met de Heat Tool totdat het embossingpoeder mooi glanzend zilver was.

Now it was time to heat emboss! I poured the embossingpowder onto the cardstock, lightly tapped the excess of ( My personal preference is not to apply the embossingpowder too perfectly) and heated it with a Heat Tool until the powder looked shiny and silvery!


Eigenlijk kon ik die drie dubbel geemboste stroken prima zo al op mijn basiskaart doen, maar ik besloot er nog een schepje bovenop te doen, door eerst de stroken los te halen (ik knipte het plakband gewoon door) en dan elke strook te verdelen in een strook van 2,5 en 2 cm. Deze husselde ik door elkaar, en plakte ik speels verspringend op mijn achtergrondpaneel.

In fact I could have used the three double embossed pieces on my card just as they were, but I decided to step it up a bit, by first simply cutting the pieces apart (by simply cutting the tape with scissors) and then cutting each part in a 2,5 and a 2 cm strip, mixing them a bit, and them adhering them loosely on my backgroundpanel!


Zo had ik een mooie en speelse basis gemaakt voor mijn kaart.

That way I had made a nice and playful base for my card!


Ik voegde een mooie bloemcompositie toe met de set Fragrant Layers. Natuurlijk gebruikte ik hier weer dezelfde kleuren voor!

I added a lovely flower composition with the set Fragrant Layers. Ofcourse I used the same colours again!


Ook hier heat emboste ik de lijntjes om het zilver ook hier in terug te laten komen.

Again I heat embossed the lines, to continue the silver here as well.


Voor wat contrast voegde ik een witte cirkel toe onder de bloemen, die ik stanste met de Spotlight on Nature stansset. Ook de witte uitgestanste kleine bloemetjes voegen extra contrast toe.

For some contrast I added the white circle that was made with the Spotlight on Nature Dies. The small diecut flowers add some contrast as well!


Oh kijk eens naar al die mooie zilverglans! En de Klassieke Strasssteentjes die ik in de bloemhartjes plakte maken het helemaal af! Nou, dit was echt een heel leuke techniek om te doen!

Oh just look at all that silvery shine! And the Basic Rhinestones that I added to the flowercentres are a wonderful finishing touch! The card is finished now. Well this indeed was a fun technique!

 Met deze kaart doe ik ook meteen mee aan de challenge 536 van Global Design Project, waarin we deze leuke kaart van Leah Dixon mochten Casen! Ik nam de cirkel met afbeelding over, de speels geplaatste strips (al deed ik ze horizontaal) en het embossen, al deed ik dat bij de strips in plaats van de achtergrond. Een beetje van Leah, en een beetje van mezelf dus!

With this card I also participate in the challenge 536 of Global Design Project, in whick we were asked to CASE this fun card of Leah Dixon. I took the circle with the image, over the playfully placed strips (although I did that horizontally) and the embossing (which I did to the strips instead of the background. So... A bit of Leah, and a bit of me!


Heel erg leuk dat je vandaag bij de Kijkkast bent komen kijken! Heb je vragen? Stel ze mij gerust! Onderaan dit bericht vind je een lijst met alle gebruikte producten, en deze zijn allen te bestellen bij de Kijkkast! Ik help je graag! Dan is het nu tijd om verder te hoppen, de links naar de andere designers vind je hier onder! Heel veel plezier alvast, en hopelijk tot snel! XXX Annette💚

I really love the fact you visited de Kijkkast today! Please just ask when you have any questions! Below you will find a list of all the products I used. All products can be ordered through de Kijkkast. I will be happy to help you! I now invite you to hop to the other designers to see what they made. Have fun, and feel free to visit de Kijkkast any time you like! XXX Annette💚

You are invited to the Inlinkz link party!

Click here to enter

Wat heb ik gebruikt:
Stempels:Fragrant Layers
Papier: Cardstock: Bubble Bath, Granny Apple Green, Petunia Pop, Basic White
Inkt: Bubble Bath, Granny Apple Green, Petunia Pop, Versamark
Dies: Fragrant Layers Dies, Spotlight on Nature Dies
Embossinfolder: Lovely Stripes Embossingfolder
Embellishments: Embossingpowder Silver, Klassieke Strass Steentjes
Tools: Stampin'Cut & EmbossMachine, Stampin'Roller,Take Your Pick Tool, Embossing Addition Tool Kit, Paper Snips
Overige: Plakband


Lees HIER alle nieuws en acties van februari!!


Lever tussen 3 en 28 februari je Bonusdagen Kortingscodes in!
Voor elke Kortingscode krijg je 6 euro korting op je bestelling.
Lees HIER alle info.


Eerstvolgende (MEE)besteldagen:
                            Maandag 2 maart, 19.00 uur
                            Maandag 9 maart, 19.00 uur
                        

Dat kan 7 dagen per week, 24 uur per dag!


Product van de maand Februari!
Het Exclusieve Designpapier Painted Illusions
kun je voor slechts 6 euro meebestellen bij een bestelbedrag vanaf 90 euro


Doe mee met de Online Craft Class Lovely Blossoms!
Gewoon vanuit je eigen huis, op je eigen moment, in je eigen tempo!

Koopjes en laatste kans items aangevuld!!
Er zijn weer nieuwe ONLINE ONLY-PRODUCTEN!
Volop nieuwe items, die niet in de catalogi staan!
Je vindt ze >>HIER<<


Voel je welkom bij de Kijkkast VIP Lounge!
Extra voorbeelden, Kijkkast Lives, Online open huis, extra tips, gratis workshops!
Lees HIER hoe ook jij Kijkkast VIP kunt worden!


💓De allerbeste DEAL: Het Stampin'Up! Startpakket!💓
Kies voor 175 euro en betaal slechts 129 euro
Krijg vervolgens minimaal 20 procent korting op volgende bestellingen,
Gratis toegang VIP Lounge! en meer!
Alleen in februari ontvang je GRATIS EXTRA bij je Startpakket de nieuwe Stampin'Positioner!
Lees HIER alle info over deze actie!


KIJKKAST WORKSHOPS!!
Check >>>HIER<<< het nieuwe workshopprogramma voor de komende tijd!!!


en spaar voor gratis producten!
***Met diverse Clubvoordelen ;o)***


Catalogus aanvragen:
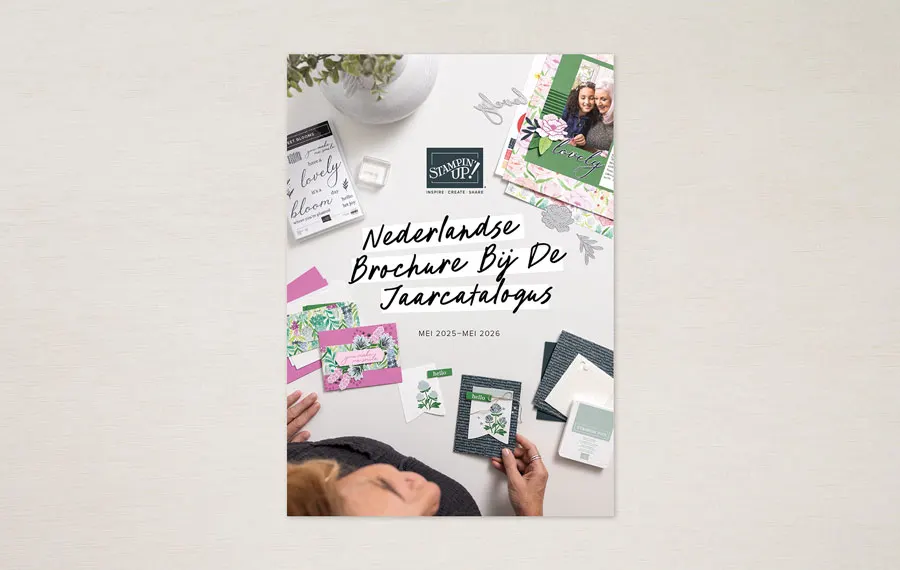
Wil jij de actuele JAARCATALOGUS 
 of de nieuwe voorjaars Mini Catalogus ontvangen?
Vraag deze nu bij mij aan via een >>email<<! Opsturen of afhalen is mogelijk!
Meer info is te vinden op de Catalogus Info