
Eindelijk kwam het er even van om het plannetje dat al een flinke poos in mijn hoofd zat uit te voeren!

En het werd eigenlijk wel ongeveer zo'n beetje wat ik voor ogen had!
Een superherfstige kaart met....
drie van mijn favoriete thema's er in!

Herfstkleuren, paddenstoelen, en postzegels! Ik ben er dol op!
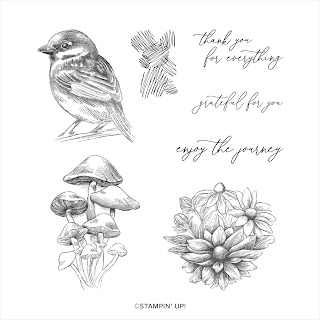
Bij deze set Inspirational Sketches, die te vinden is in de jaarcatalogus zit immers zo'n supermooie paddenstoelenafbeelding! Dus ja, op deze herfstige dag moest ik daar echt iets mee doen!


Ik maakte er een setje bij elkaar passende postzegels mee! Met de Perennial Postage Dies is dat zo makkelijk! Het is een van de meest gebruikte basisstanssets in mijn rek!

Ik kleurde de afbeeldingen in met Stampin'Blends in natuurlijke kleuren. De randjes van de vlakjes zette ik aan met mijn favoriete stempelproduct: Inkt, in combinatie met een Sponge Dauber.
De warme kleur Copper Clay, in combinatie met Wild Wheat is perfect voor kaarten met natuurlijke kleuren.


Om de postzegellook nog realistischer te maken gebruikte ik wat passende stempels uit de set Sending Love.
Zo zien de postzegels er "gebruikt" uit ;o) Het stempelen hiervan heb ik dus bewust niet te keurig gedaan.

De achtergrond kreeg een mooi houtstructuurtje met de Timber 3 Embossingfolder. Deze sluit natuurlijk prachtig aan bij het herfstbosgevoel!
De randjes inkte ik, voor een extra warme gloed, en ook stempelde ik hier en daar wat poststempels, om het helemaal in stijl te houden.

Daarna wikkelde ik er meerdere keren Linen Thread omheen, en dan vooral een beetje willekeurig, voor een finishing touch.
Als laatste spetterde ik er nog wat Smoky Slate inkt overheen met een Water Painter. Gewoon voor de verweerde look.


Met deze kaart doe ik weer mee aan een paar challenges, gewoon omdat het zo leuk en inspirerend is!
De schets haalde ik uit deze Challenge van Freshly Made Sketches,
Bij As You See it vragen ze om mijn favoriete item om mee te stempelen en dat is wederom INKT, waar ik mee heb gestempeld, ge inkt, geblend en gespetterd.
En bij The Paper Funday Challenges vroegen ze deze keer om typische herfstkleuren. Nou, dat is gelukt!

Het is zo vreselijk leuk om zo bewust met de tijd van het jaar bezig te zijn, ook in mijn stempelwerkjes!
Wat heb ik gebruikt:
Stempels: Inspirational Sketches, Sending Love
Papier: Cardstock: Very Vanilla, Copper Clay, Wild Wheat
Inkt: Memento Black, Copper Clay, Wild Wheat, Smoky Slate
Dies: Perennial Postage Dies
Embossingfolder: Timber 3D Embossingfolder
Stampin'Blends: Copper Clay, Wild Wheat, Broze-Ivory, Crumb Cake
Embellishments: Linen Thread
Tools: Stampin'Cut & Emboss Machine, Water Painters, Sponge Daubers, Blending Brushes
Tot snel!
Annette
Eerstvolgende (MEE)besteldagen:
Maandag 21 oktober 19.00 uur
Maandag 28 oktober 19.00 uur
Dat kan 7 dagen per week, 24 uur per dag!
Zo veel MOOIS!
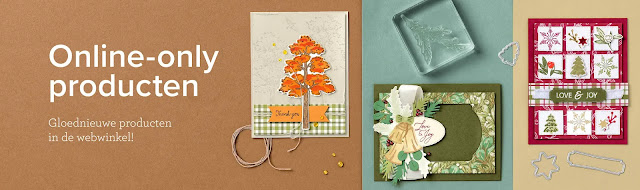
ONLINE ONLY-PRODUCTEN!
Volop nieuwe items, die niet in de catalogi staan!
Je vindt ze >>HIER<<
Voel je welkom bij de Kijkkast VIP Lounge!
Extra voorbeelden, Kijkkast Lives, Online open huis, extra tips, gratis workshops!

Lees HIER hoe ook jij Kijkkast VIP kunt worden!
💓De allerbeste DEAL: Het Stampin'Up! Startpakket!💓
Kies voor 175 euro en betaal slechts 129 euro
Krijg vervolgens minimaal 20 procent korting op volgende bestellingen
Gratis toegang VIP Lounge! en meer!
Lees HIER alle info!

Altijd leuke koopjes in het KOOPJESREK, op is op!
KIJKKAST WORKSHOPS!!

Check >>>HIER<<< het nieuwe workshopprogramma voor de komende tijd!!!
en spaar voor gratis producten!
***Met diverse Clubvoordelen ;o)***
Catalogus aanvragen:


Wil jij de NIEUWE JAARCATALOGUS en/of de nieuwe najaarsmini-catalogus ontvangen?
Vraag deze nu bij mij aan via een >>email<<! Opsturen of afhalen is mogelijk!
Meer info is te vinden op de Catalogus Info