
***This Blogpost is in English and Dutch!***
Welkom bij deze bloghop van het International Totally Techniques Designteam! We hebben ook deze
maand weer een leuke techniek "uitgediept" en laten je samen diverse voorbeelden zien!
Leuk dat je er bent!
Welcome to this Bloghop of the International Totally Technique Designteam! This month we have chosen another fun technique again and together we will show you several examples of it! Happy to see you here!
Deze maand doen we iets heel erg leuks! We gaan namelijk Shaker kaarten maken!
This month we have been busy with something fun: Shaker Cards!
.png)
Shaker kaarten zijn interactieve kaarten. Ze bevatten een venster waarachter losse elementen zitten die bewegen zodra je de kaart schudt! Alhoewel ze helemaal niet zo ingewikkeld zijn om te maken zien ze er vaak sensationeel uit!
Shaker Cards are Inter Active Cards! There is always a kind of window with loose elements behind it, that move when you shake the card. Although they are not that complicated to make they often look sensational!

Het is altijd leuk om in een bloghop wat variaties te laten zien. Gewoonlijk is zo'n venster transparant, vaak bedekt met een venster van transparant sheet. StampinÚp! heeft dit materiaal dan ook in het assortiment. Maar ik bedacht mij dat je ook kunt kiezen voor een semi transparant materiaal voor het raam, zoals hier het Vellum Cardstock! Dat geeft een leuke twist aan dit type kaarten!
It is always fun to present some versatility in a Bloghop. Usually the window of a shaker card is completely transparant and made by some clear Window Sheet, which StampinÚp! is offering in our collection. But I thought choosing some semi transparent material for the window might be a fun variation. This really gives a nice twist to the well known type of Shaker Cards.
.png)
Maar als je voor een semitransparant venster kiest moet je er eigenlijk wel voor zorgen dat wat er achter zit duidelijk en een beetje simpel van vorm, en zonder details is, om het door zo'n half transparant raampje nog te kunnen herkennen!
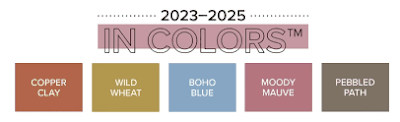
Hier koos ik dan ook voor een lading ballonnen in frisse, stevige kleuren! Mijn voorraad kon wel wat mannenkaarten gebruiken, dus daar heb ik mijn kleurkeuze een beetje op gebaseerd. Toevallig zijn het allemaal nieuwe of terugkomende kleuren die het samen geweldig doen! Blueberry Bushel, Azure Afternoon en Lemon Lime Twist!
But when you choose a semi transparent window you have to keep in mind that what you put behind it has to be clear, simpel, bold and without details to make sure you will be able to see what it is when the card is finished.
For this card I have chosen for a handful of balloons in fresh bright colours. I did not have many masculine cards in my stash so that is why I decided to use this colourscheme. All three colours happen to be new or returning colours, that work together fabulously! Blueberry Bushel, Azure Afternoon and Lemon Lime Twist!

Hierbij maakte ik gebruik van deze nieuwe set: Feestballonnen, de Nederlandstalige variant van Beautiful Balloons! Leuke en veelzijdige stempels, mooie teksten, en de bijpassende stansen maken het helemaal een topper om mee te werken! Zo veel leuke elementen! En omdat de ballonnen een mooi neutraal en tijdloos feestthema hebben, kun je de set voor echt alle feestelijke momenten gebruiken!
I used the new set Feestballonnen, the Dutch version of the set Beautiful Balloons! Fun and versatile stamps, to the point texts, and those gorgeous matching dies make it a great set to work with. So many fun elements! And since balloons are a very timeless and neutral festive theme you can use this set for every festive occasion!
.png)

De eerste stap was het stansen van een opening uit een stukje Basic Black cardstock. Deze leuke vorm is een van de stansen in de nieuwe Nested Essentials Dies. oftewel Samengestelde Basisvormen Stansen. Deze set is een echte basic en de vormen heerlijk net weer even anders! Achter de opening plakte ik een stuk Vellum Cardstock, en vervolgens kwam op dit venster een tekst uit de set die ik behandelde met zwart embossingpoeder!
The first step was diecuttingthe opening in a piece of Basic Black cardstock. This lovely eyecatching shape comes from one of the dies in the new Nested Essentials Dies! This set of dies is a true asic, but is also beautifully detailed and just a bit different! I adhered a piece of Vellum. Cardstock behind it. On the vellum I added a text that was heat embossed in black.
.png)
Aan de achterzijde bracht ik stroken Foam Adhesive strip aan rondom de opening en langs de randen van het paneel. Met deze strips creeer je hoogte waardoor de schudelementen goed kunnen bewegen maar houd je ze tegelijkertijd ook goed binnenboord.
On the backside I added piees of Foam Adhesive Strips and along the sides of the panel. Whit these strips you create hight which provides space to let the shaker elements move freely. On the other hand it also prevents the elements to escape at the same time.
.png)
.png)
Met de stansen stanste ik vervolgens een lading ballonnen uit, veel kleine en een paar grotere, en legde deze op een hoopje op het achterpaneel. Daarna haalde ik de beschermstrookjes van de foam strips af en plakte ik het paneel met het venster er zorgvuldig overheen. De ballonnen zitten nu opgesloten.\
Tip 1: door een witte achtergrond te kiezen steken de ballonnen goed af bij de achtergrond, waardoor ze mooi zichtbaar blijven
Tip 2: Door vooraf voorzichtig even te testen kun je zien hoeveel ballonnen je het beste in de Shaker stopt, Zowel te veel als te weinig maakt namelijk dat de kaart minder goed schudt. Ik kwam nu op deze hoeveelheid uit voor een optimaal schudresultaat!
With the dies I diecut a stack of balloons , many smaller ones and few of the bigger kind. I made a pile of them in the centre of the backpanel and carefully placed the windowed panel on top of it after removing the proection from the foam strips. The balloons can't escape anymore!
Tip 1: By choosing the white background colour there is a beautiful contrast with the balloons, which helps with keeping them clearly visible.
Tip 2: By testing before adhering anything you can test how many balloons you need to make the shaker effect optimal. Too little does not work, and to much neither. This is the amount that was optimal for the shakingresults of this version!
.png)
Met de stempelset stempelde ik een aantal extra ballonnen, touwtjes en tassels op een apart stukje papier. De zwarte items heat emboste ik weer. Alles werd uitgestanst, op de touwtjes na. Die knipte ik.
With the stampset I stamped some extra Balloons, ropes and tassels on an extra piece of cardstock. The black items were heatemossed again. All elements were diecut, but not the ropes, I fussycut those.
.png)
De ballonnen kwamen op de kaart. Daarna maakte ik het af met wat Festive Pearls, en wat sterren die ik uitstanste uit metallic Foil Sheet. Het zilver doet het goed bij het gekozen kleurpalet!
The balloons were placed on the card. I finished the card with some Festive Pearls and with some stars that were diecut from somemetallic foil sheet. The silver matches very well with the chosen colour scheme.
.png)
Heel erg leuk dat je vandaag bij de Kijkkast bent komen kijken! Heb je vragen? Stel ze mij gerust! Onderaan dit bericht vind je een lijst met alle gebruikte producten, en deze zijn allen te bestellen bij de Kijkkast! Ik help je graag! Dan is het nu tijd om verder te hoppen, de links naar de andere designers vind je hier onder! Heel veel plezier alvast, en hopelijk tot snel! XXX Annette💚
Wat heb ik gebruikt:
Stempels: Feestballonnen
Papier: Cardstock: Basic Black, Basic White, Lemon Lime Twist, Azure Afternoon, Blueberry Bushel
Vellum Cardstock
Foil Sheet Silver
Inkt:Lemon Lime Twist, Azure Afternoon, Blueberry Bushel, Versamark
Dies: Beautiful Balloons Dies, Nested Essentials Dies( Samengestelde Basisvormen Stansen)
Embellishments: Festive Pearls, Embossingpowder Black
Extra: Foam Adhesive Strips
Tools: Stampin'Cut & Emboss Machine, Heat Tool, Embossing Additions Tool Kit, Paper Snips
Eerstvolgende (MEE)besteldagen
Maandag 29 mei 19.00 uur
Aanbieding: Kijkkast In Colorpakketten! Keus uit vier opties!
Klik HIER voor alle informatie!
ONLINE ONLY-PRODUCTEN!
Volop nieuwe items, die niet in de catalogi staan!
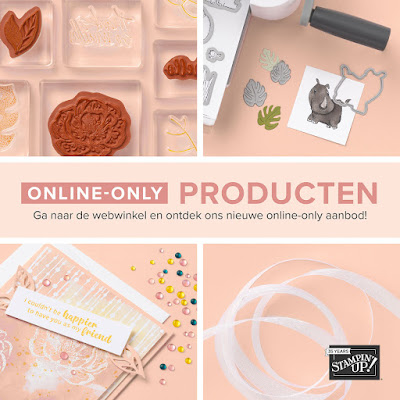
(Klik op de afbeelding om het aanbod te bekijken!)
💓De allerbeste DEAL: Het Stampin'Up! Startpakket!💓
Kies voor 175 euro en betaal slechts 129 euro
minimaal 20 procent korting op volgende bestellingen
Gratis toegang VIP Lounge!
Lees HIER alles!
NIEUWE KIJKKAST WORKSHOPS!!

Check >>>HIER<<< het nieuwe workshopprogramma voor de komende tijd!!!
Catalogus aanvragen:

Wil jij de dikke Jaarcatalogus, of de nieuwste Minicatalogus ontvangen? Vraag ze nu bij mij aan!
Klik HIER voor alle info!
en spaar voor gratis producten!
***Met diverse Clubvoordelen ;o)***
Geen opmerkingen :
Een reactie posten
Een reactie wordt heel erg op prijs gesteld, is motiverend, inspirerend en maakt me gewoon blij. Dankjewel!