

*This Blogpost is in Dutch AND English!*
Welkom bij de Februari Bloghop van het internationale Thinking Outside of the Box-Design Team!
Je bent hier zojuist begonnen, of je bent hier gekomen via Carrie Bates, mijn lieftallige Britse stempelcollega.
Hello and welcome to the Februari Bloghop of the Thinking Outside of the Box Design Team! You just started this bloghop here, or you got here through ,Carrie Bates my lovely ellow demonstrator from England.

Deze maand was de opdracht een openslaand doosje te maken om flesjes in te doen, een soort houdertje!
This month the challenge was to make a Bottle Box! An Openfolding box in which you can put some small bottles!

Aangezien ik geen leuke kleine flesjes had besloot ik het zelfde model doosje te maken, maar dan niet voor flesjes maar voor iets anders. Iets dat meer van toepassing was op de persoon die dit doosje gaat ontvangen! Dit is 'm geworden!
Since I had no nice small bottles I decided to change the idea a little. I would make a box in the given shape but instead of bottles I would make it for something else! And this is what was the result!

Ik maakte een openvouwend doosje met...... doosjes! En niet zomaar doosjes, maar de Clear Tiny Treat Boxes die in de Stampin'Up! catalogus staan!
I made an openfolding box for.... little boxes! Those Clear Tiny Treat Boxes that are in the Stampin'Up! catalogue!

Herken je ze?
Did you recognize them?
Ik vond het een leuk idee om deze er voor te gebruiken, omdat iedereen aan deze doosjes kan komen door ze te bestellen, en dus ook iedereen de maten in deze stap-voor-stap beschrijving kan gebruiken! Je kunt natuurlijk van alles in de doosjes doen, maar jellybeans doen het wel HEEL erg leuk, zeker in combinatie met de gebruikte producten uit de How Sweet It Is suite! een perfecte match!
I thought it would be a nice idea to use these, because everybody can order them, so everybody wil be able to use the sizes of the step-by-step tutorial I made! Ofcourse you can fill the boxes with whatever you want but I think those jellybeans make the box look happy and festive and they match perfectly with the products I used from the How Sweet it Is Suite!
Aan de slag! ;o)
Let's make one! ;o)
Voor het doosje gebruikte ik maar 1 vel A4 cardstock in de kleur Melon Mambo! Dit snijd je in twee delen:
For this box I use only one sheet of A4 Melon Mambo cardstock! I cut this into two parts:
*1: 16 x 29,7 cm
*2: 5 x 29,3 cm
Neem het grootste stuk in de breedte en ril dit op 4,1-6,8-12,2-17,7-23,1 en 25,8 cm
Take the biggest piece horizontally and score this at 4,1-6,8-12,2-17,7-23,1 and 25,8 cm

Vouw dit deel in model zoals afgebeeld op deze foto:
Now fold this piece as shown on this picture:

Werk alle vier de hoeken af met de Detailed Trio pons en maak hiermee ook meteen twee gaatjes aan de beide korte zijden.
Now decorate all four corners with the Detailed Trio Punch and also make two small holes in both short sides.


We hebben nu dit:
Now we have this:


Neem nu het kleinste deel cardstock en ril dit op 1,5-6,9-22,4-en 27,8 cm
Now take the smallest piece of cardstock and score this at 1,5-6,9-22,4 and 27,8 cm

Markeer nu op de tweede en derde rillijn het punt op 3 cm van de bovenkant.
Mark the second and third score line at 3 cm from the upper edge.

Verbind de punten met elkaar en met de bovenkanten van de eerste en vierde rillijn, en snijd of knip langs deze lijn het bovenste deel weg, zoals hier onder te zien is.
Now connect the marked points, and connect them diagonally with the first en fourth scored line. Now cut these lines and remove the upper part, as shown on the picture below.

Vouw nu de rillijnen en plak de twee korte strookjes met Tear & Tape adhesive, stevig in het buitendoosje
Now burnish all the scored lines and adhere this part in the big part of the box, using Tear and Tape on both the 1,5 cm ends of this piece.

Nu gaan we beginnen met de aankleding. Ik nam hiervoor een mooi vel gestreept papier uit het How Sweet It Is DSP!
Now it is time to do some decorating. I used a lovely striped sheet from the How Sweet it Is DSP

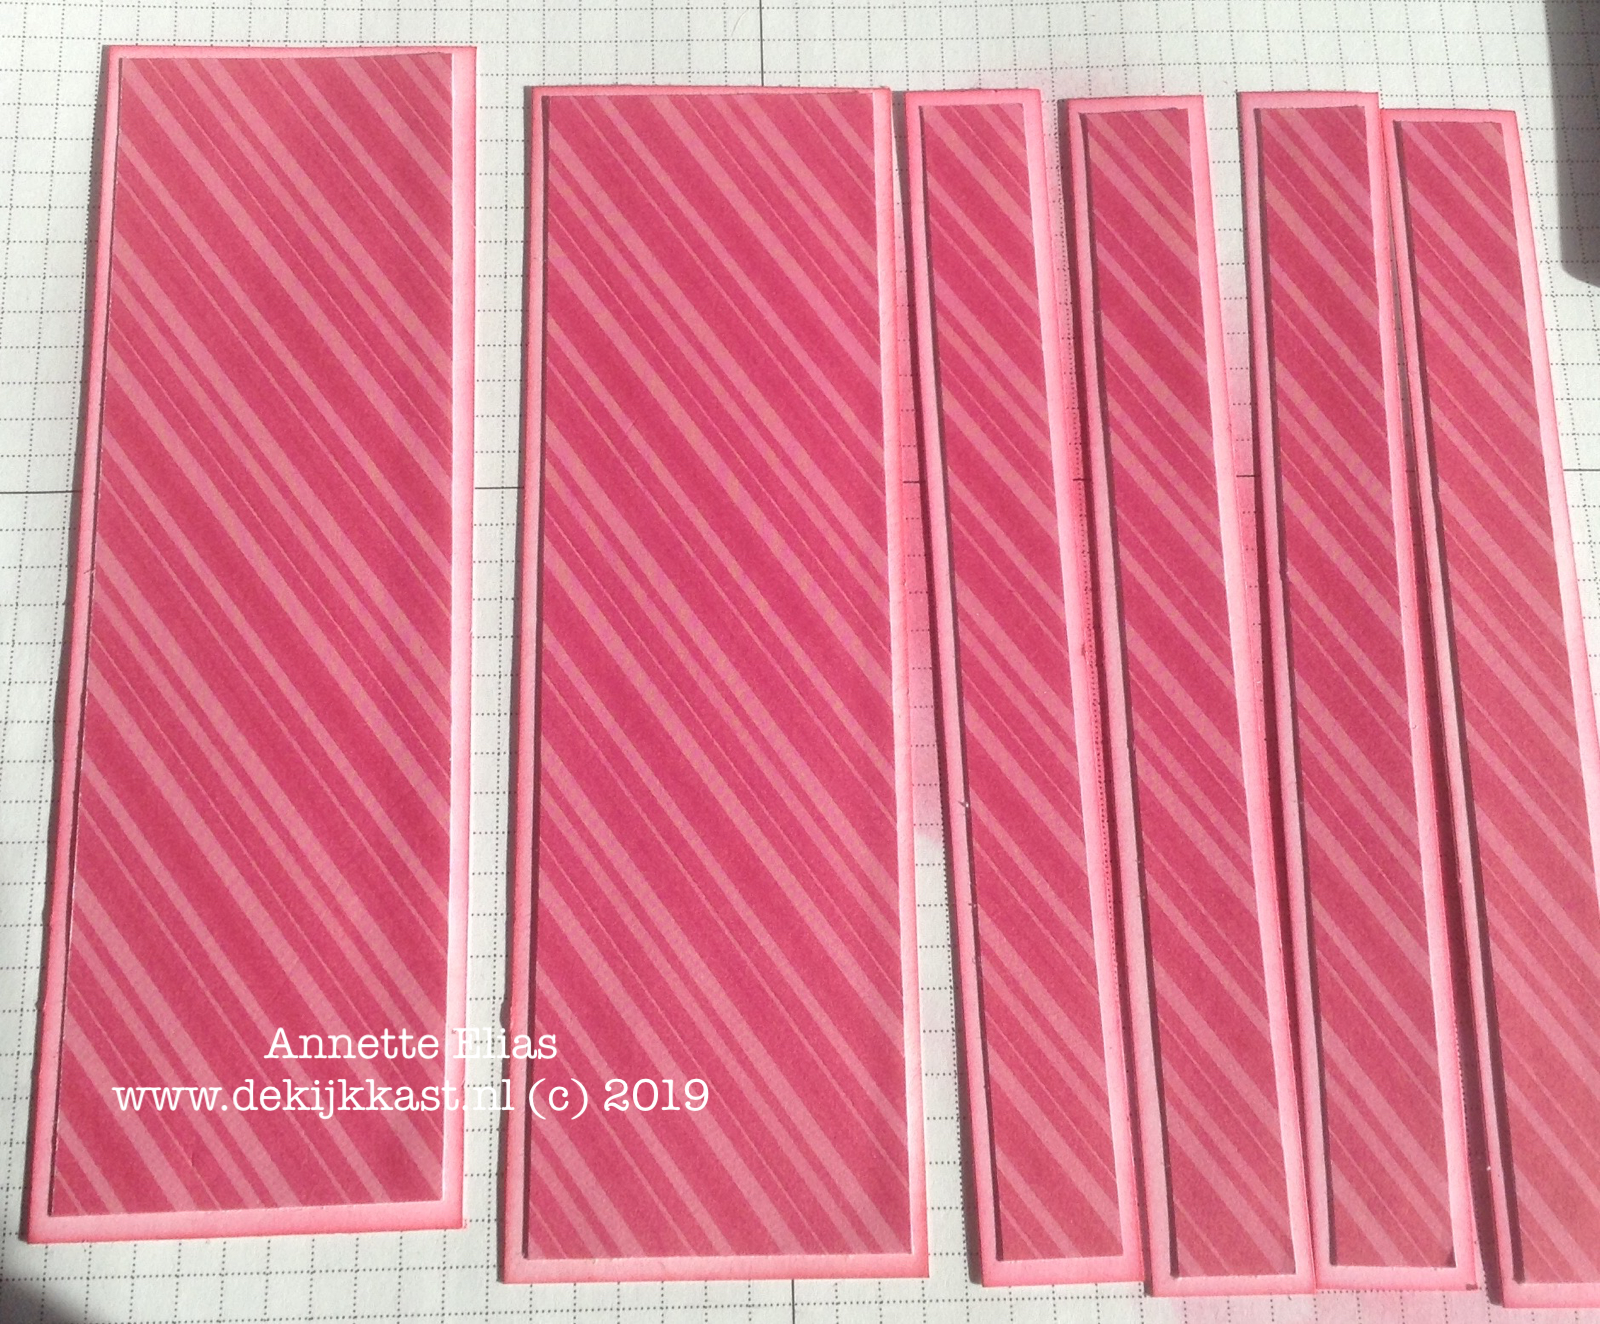
Van het DSP sneed ik:
From the DSP I cut:
2x 15 x 4,4 cm
4x 15 x 1,4 cm
Van Whisper White Cardstock sneed ik:
From Whisper White Cardstock I cut:
2 x 15,5 x 4,9 cm
4x 15,5 x 1,9 cm

Ik sponsde de randjes van de strookjes Whisper White zodat ze mooi gingen passen bij de lichtere Melon Mambo strepen in het DSP
I Sponged the edges of the Whisper White pieces to make them match the muted Melon Mambo stripes in the DSP

En daarna plakte ik de stukjes op elkaar, en vervolgens op het buitendoosje
After this I glued the pieces together and on the box!

Nu komt het stempelwerk ;o) Ik stempelde twee potten, de jelly beans en de tekst en het label en kleurde ze in met Stampin'Blends. Ik koos kleurtjes die bij mijn echte jelly beans passen. Op een strookje stempelde ik een andere tekst, en werkte deze ook af met de Detailed Trio Punch
Now it is time to stamp! I stamped two jars, the jelly beans, the sentiments and the label en colored them with Stampin'Blends. I chose colors that match my real jelly beans! On a strip of paper I stamped another sentiment and decorated two corners with the Detailed Trio Punch again.

De potten en het label sneed ik uit met de bijpassende Jar Of Sweets Framelits
The jars and label were diecut with the matching Jar Of Sweets Framelits.

(Sweetest Thing Stampset/ & Jar of Sweets Framelits dies. Bestellen als bundle geeft tien procent korting)
Ik plakte de strip met tekst aan de binnenkant van het doosje en wikkelde een stukje Grosgrain Ribbon om de flap heen. Onder het knoopje deed ik een gluedot zodat hij goed op z'n plek blijft zitten.
I attached the strip on the inside of the box and wrapped a piece of Grosgrain Ribbon around it. Below the knot i added a Glue dot to make sure it stays where I want it.

De voorkant van het doosje versierde ik met de uitgestanste onderdelen en nog een klein strikje.
The front of the box was decorated with the diecut pieces and a small bow.

Nu konden de gevulde snoepdoosjes er in!
Now it was time to add the filled tiny boxes!

En door een stukje Polka Dot tulle Ribbon en Grosgrain ribbon door de geponste gaatjes te halen en te strikken, kon ik nu het doosje sluiten.
And by putting both polka Dot Tulle Ribbon AND Grosgrain Ribbon through the punched holes I was able to tie and close the box.


Echt een snoeperig kadoosje zo ;o)
This is really a "sweet" box ;o)

Met een verrassende (smakelijke) binnenkant!
With a ( tasty) suprise inside!

Ik hoop dat je veel plezier gaat hebben met dit project! Moeilijk is het niet, en het effect is best tof! Laat me vooral weten wat je er van vond, en of jouw exemplaar ook gelukt is! Bedankt voor je bezoek aan de Kijkkast! X Annette
I hope you will enjoy making this project! It is not diffucult and the effect is fun! Please let me know how you like it and whether you succeeded in making your own version! Thank you for visiting de Kijkkast! X Annette

En dan is het nu tijd om te bloghop te vervolgen! De volgende "halte"is bij Dena Ik weet zeker dat ze weer iets moois gemaakt heeft (dat doet ze altijd!)!
Now it is time to continue this bloghop! Next stop is at Dena I am sure she made something beautiful (as she always does!)!
Blogvolgorde/ Order of the Blog Hop:
Shannean Moncrieff Australia
Tanja Kolar Germany
Carrie Bates United Kingdom
Annette Elias Netherlands ( hier ben je nu, you are here now!)
Dena Rekow United States
Beate Wacker Austria
Aude Barbara France
Barbara Stewart Canada
Gebruikte materialen/ Used products
Stempels: Sweetest Thing
Papier: Cardstock : Melon Mambo, Whisper White
DSP:How Sweet It Is DSP
Inkt: Basic Gray, Melon Mambo, Call Me Clover
Doosjes: Clear Tny Treat boxes
Dies: Jar of Sweets Framelits
Pons: Detailed Trio
Embellishments: Grosgrain Ribbon Call Me Clover, Dotted Tulle Ribbon Whisper White
Stampin'Blends: Call Me Clover light & dark, Pool Party Dark, Daffodil Delight Dark, Pumpkin Pie Dark, Lovely Lipstick Light, Poppy Parade Light
Tools: Stampin'Sponges, Big Shot
Eerstvolgende (mee)besteldagen:
Maandag 18 februari om 19.00 uur
Maandag 26 februari om 19.00 uur
-O-O-
 "Pin on Pinterest")


Wil jij graag de jaarcatalogus en/of de NIEUWE voorjaarscatalogus ontvangen??
Vraag er eenvoudig eentje aan door mij een EMAIL te sturen
Of doe een bestelling, dan voeg ik hem er gratis bij!

Great box Annette - the clear treat boxes were such a clever addition to this project and I love the rainbow colours of the sweets. Carrie x
BeantwoordenVerwijderen